How to Assemble Your Maxtand: A Step-by-Step Guide for Optimal Setup
How to Assemble Your Maxtand: A Step-by-Step Guide for Optimal Setup
on May 27, 2024
Are you excited to start using your new Maxtand adjustable laptop stand? This innovative stand offers unparalleled flexibility and ergonomic benefits, transforming your workspace into a comfortable and efficient environment. Here’s a comprehensive guide on how to assemble your Maxtand, including Maxtand 1.0 (MT1), and Maxtand 2.0 (MT2) Regular and Slim, ensuring you get the most out of this versatile product.
Step-by-Step Assembly Guide
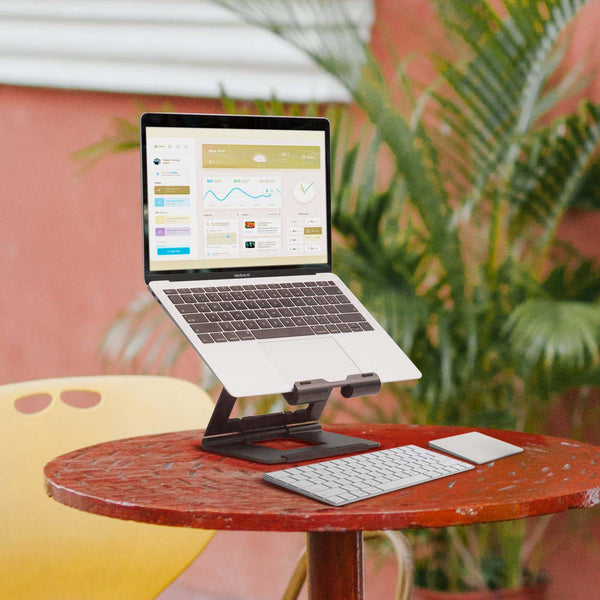
Unbox Your Maxtand: Start by carefully unboxing your Maxtand. Inside, you’ll find the main components: the top plate, upper support arm, lower support arm, and the base plate. Make sure all components are present and free from damage.
Attach the Top Plate: Begin with the top plate, which is where your laptop will rest. Locate the fixed gear at the bottom of the top plate. Align this with the corresponding gear on the upper support arm. Engage the gears and secure them using the provided screws. Tighten the screws to ensure a stable connection.
Connect the Upper Support Arm: The upper support arm connects the top plate to the lower support arm. Align the gears at the end of the upper support arm with the fixed gear on the lower support arm. Once aligned, secure the connection with screws and tighten them to maintain stability.
Secure the Lower Support Arm to the Base Plate: The lower support arm should now be attached to the base plate. Align the gears on the lower support arm with the fixed gear on the base plate. Secure this connection using screws and ensure they are tightly fastened.
Adjust the Height and Angle: To adjust the height, unlock the gear locking mechanism on the lower support arm by loosening the screws. Slide the lower support arm up or down to your desired height, then re-engage the locking mechanism and tighten the screws. For angle adjustments, unlock the gear mechanism on the upper support arm, adjust to your preferred angle, and secure the position by tightening the screws.
Final Checks: Ensure all screws are tightly fastened and the stand feels stable. Place your laptop on the top plate and make any final adjustments to height and angle for maximum comfort.
Key Benefits of Maxtand:
Ergonomic Design: Maxtand helps you maintain proper posture by allowing you to adjust your laptop to eye level, reducing neck and back strain.
Sturdy and Reliable: Made from premium aluminum alloy, Maxtand can hold up to 154 lbs, providing a stable and secure platform for your laptop.
Portable and Foldable: Weighing only 4.8 lbs, Maxtand is easy to carry and can be folded into a compact size, making it ideal for travel.
Broad Compatibility: Compatible with laptops from 10 to 15 inches, Maxtand is versatile and suitable for various devices.
Conclusion: Assembling your Maxtand adjustable laptop stand is straightforward and quick, allowing you to enjoy its ergonomic benefits immediately. Whether you're working from home, at the office, or on the go, Maxtand ensures you have a comfortable and efficient workspace. Experience the difference today -> Maxtand 1.0 (MT1), Maxtand 2.0 (MT2) Regular and Slim.
🖥️ The Laptop Stand That Goes Wherever You Go Work Anywhere. Sit Better. Carry Less. 🔍 Built for Movement. Designed for Stability. Meet the Rmour Ridge Stand — a portable...
THE ULTIMATE 2-IN-1LAPTOP STAND AND MAGNETIC DESKTOP ORGANIZER Rmour MT3 stand supports both sitting and standing use, reducing discomfort from prolonged device use. Its magnetic storage feature helps keep your...
R7 MagSafe Phone & Apple Watch Stand: Elevate Your Charging Experience Dual Functionality: Phone Stand and Watch Charger Charge and Display in Style The R7 MagSafe Stand is not just...
Z1 Mouse Pad Clip – Your Ergonomic Desk Accessory The Z1 Mouse Pad Clip offers an ergonomic and adjustable solution to improve your working posture. Designed to attach easily to...